
How Do You Temporarily Cover A Damaged Roof In Wylie?
When disaster strikes your roof, whether it be from a storm, fallen tree, or wear and tear over the years, the last thing you want is water pouring into your living space. Protecting your home from further damage becomes an urgent priority. So, how do you go about effectively covering a damaged roof temporarily? In this article, we'll walk you through every step of the way, providing insights that are both practical and actionable.
Understanding the Importance of Temporary Roof Coverage
Why You Need to Act Quickly
When you notice damage to your roof, time is of the essence. A small leak can quickly turn into an extensive water issue that leads to mold growth and structural damage. This can not only harm your property but can also create health risks for you and your family.
Assessing the Damage First
Before jumping into solutions like “roof tarping near me,” it's crucial to assess how serious the damage is. Is it just a small hole or something more extensive? Take a moment to evaluate:
- Size of the damaged area
- Location of damage (valley, ridge, etc.)
- Weather conditions (is rain expected?)
Understanding these factors will guide your next steps.
How to Effectively Cover a Damaged Roof Temporarily
Gathering Your Materials
To get started on covering that damaged roof temporarily, you'll need some essential materials:
- Tarps: Heavy-duty tarps work best.
- Rope or Bungee Cords: For securing the tarp.
- Ladders: Ensure they’re sturdy and safe.
- Duct Tape: Always handy for quick fixes.
- Roofing Nails & Hammer: If needed for additional support.
If you're in a pinch, many local hardware stores carry roofing contractor Wylie these supplies.
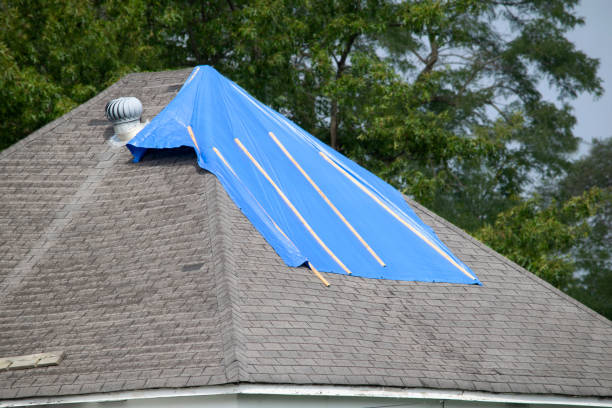
Steps to Tarp Your Roof
Safety First: Always prioritize safety when working on roofs. Wear non-slip shoes and consider using harnesses if necessary.
Choose Your Tarp: Select a tarp that's larger than the area needing coverage. Oversize is better; you want to ensure it extends beyond the damaged zone.
Positioning the Tarp: Spread the tarp over the damaged area, ensuring it overlaps onto undamaged shingles.
Securing It Down:
- Use rope or bungee cords to tie down corners securely.
- If you're in windy conditions, weigh down each corner with bricks or stones.
Check Your Work: Once secured, double-check that everything is tight and will hold under wind or rain conditions.
Monitor for Leaks: Keep an eye on things until permanent repairs can be made.
Finding Emergency Roofing Services Nearby
When To Call in The Pros?
Sometimes DIY isn’t enough, especially if you've got extensive damage. This is where emergency roofing services come into play:
What To Expect From Emergency Services
When you call for emergency help:
- They'll arrive promptly (most will have same-day service).
- Expect an inspection followed by immediate recommendations.
- They might even perform temporary repairs right away—now that’s a relief!
The Cost of Temporary Roof Repairs
Budgeting for Emergency Repairs
Costs can vary widely based on location and severity of the damage:
| Service Type | Average Cost | | ------------------------------- | ---------------- | | Temporary Tarping | $150 - $500 | | Full Emergency Repair | $500 - $1,500 | | Permanent Repairs Post-Damage | $1,000 - $10,000+ |
Don’t forget that some insurance policies may cover these costs—check in with your provider!
Preventative Measures After Temporary Coverage
Long-Term Solutions After Tarping
While tarping helps temporarily seal off leaks, long-term solutions are necessary for maintaining your roof:
- Schedule regular inspections
- Consider investing in roofing materials designed for longevity
- Always keep gutters clean to avoid water build-up
FAQs About Temporary Roof Coverage
1. How long can I leave a tarp on my roof?
You should aim to have temporary coverage last no longer than a few weeks while you arrange permanent repairs.
2. Can I install my tarp during bad weather?
It’s best to wait until conditions improve; trying during heavy winds or rain could be dangerous!
3. What if my tarp gets blown off?
Reassess immediately! If possible, get back up there and secure it again as soon as conditions allow.
4. Should I use multiple tarps?
If one isn’t enough to cover all areas efficiently—absolutely! Just make sure they overlap adequately.
5. Do I need any special permissions before doing temporary repairs?
In most cases, no permits are needed for emergency repairs—but check local regulations just in case!
6. What if I'm unable to climb onto my roof?
Contact emergency roofing services! They’re equipped with ladders and safety gear specifically designed for this purpose.
Conclusion
Dealing with a damaged roof can feel overwhelming at first glance—trust me; we've all been there! But knowing how to effectively cover a damaged roof temporarily can save you from further headaches down the line (not to mention money). Remember always to prioritize safety first when climbing up there yourself; if you're ever uncertain about what you're doing, don’t hesitate—call those "emergency roofing services" nearby!
So now that you're armed with this knowledge about how to effectively cover a damaged roof temporarily, don't let unexpected issues rain on your parade! With preparation and swift action (and perhaps some help), you'll be back on track before you know it!
Stay tuned for more tips on maintenance and repair strategies; after all—your home's health matters just as much as yours does!